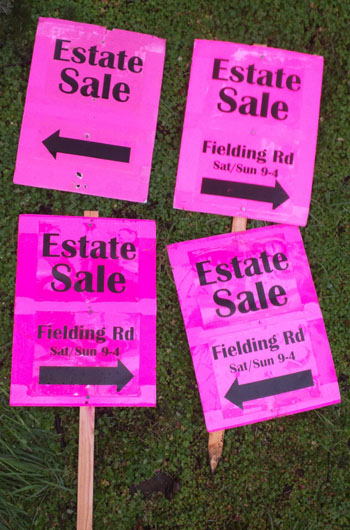
Signs from a very successful sale.
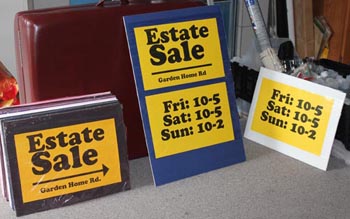
Note how the signs for the neighborhood are on a half-sheet backer boards.
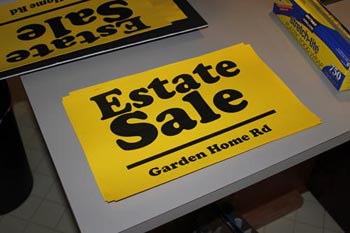
The sign for out front of the sale was on an un-cut full sheet. You don't have to do it that way, we just wanted to post hours on the same slab. There was a place to hang a double-sided sign, so this one is double sided.
You can build an A-Frame with just foam-core and some twist ties. A more elaborate A-Frame can be imagined with some 2x2 boards or some scraps of plywood (not pictured).
Lessons learned:
Think about how many Left, Right, and Forward arrow signs you need, then print a bunch of spares of each layout. Generally speaking you'll need 20% to 40% more signs than you start out thinking you do.
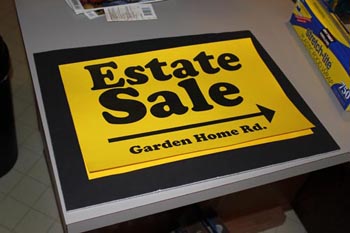
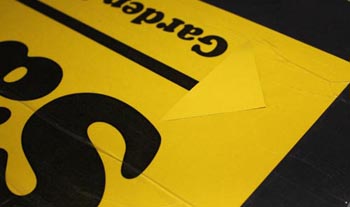
Note that there is an address under the arrows. This is a very good practice - customers can be forgetful.
If you can't edit image files, just print the address on another sheet, then cut the sheet and glue (or tape) the address strip in place.
We printed a bunch of "no direction" signs to use as new corners to post were discovered. That's optional, you know your own neighborhood better than we ever could.
Attach the sign to the backer board with tape or a glue stick.
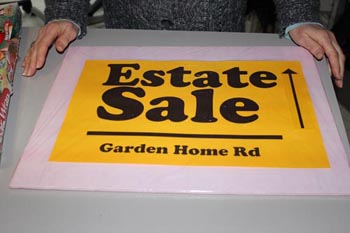
We ran out of colored foam-core and finished the project with white. Not perfect, but absolutely positively "good enough."
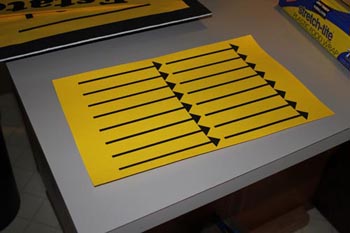
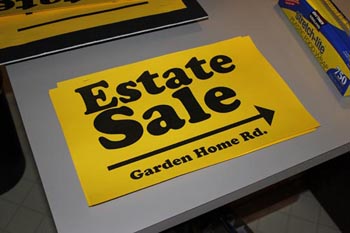
These arrows can be cut out and taped to the sign to show directions (see above).
Arrows can point straight ahead, or half-right at a "fork" in the road.
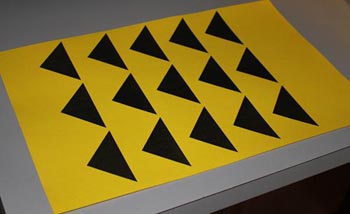 These arrows can be cut out and taped to the sign to show left and right directions These arrows can be cut out and taped to the sign to show left and right directions

If you're not sure how many of each you need, print some non directionals, and tape down the triangle black side up.
If you have too many of an arrow going the wrong way, flip a triangle and tape it down wrong side up.
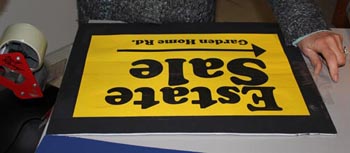
If the weather might be wet, you can add moisture resistance with wide clear shipping tape.
Go cheap with $1 rolls (45-50 feet) at Dollar Tree.
If the weather might be wet, you can add moisture resistance with 18" wide plastic food-wrap.
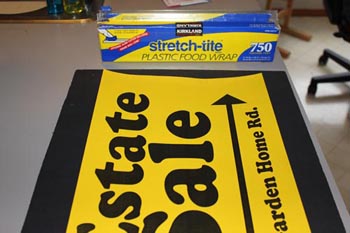
12" wide food-wrap does work if you can't find 18" food-wrap.
Here, a 12" width food-wrap covers an 11" tall sign with tape top and bottom for a weather seal.
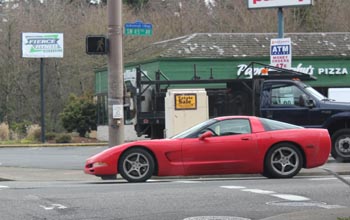
Sometimes you'll have to use tape to attach the sign. Here we used the traffic signal control computer box. Note the little red corvette that has entered the crosswalk to make a right turn, but you can still see the sign. The big dark truck behind the beige control box gave great contrast, but after it moved away, our sign still poped out.
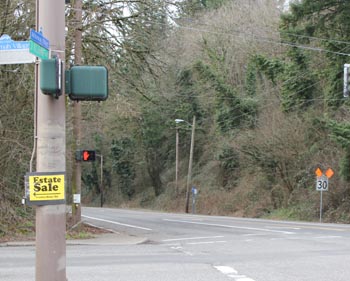
Note how the sign on a backer board is clearly visible in all the clutter of an exurban street. The traffic signal lamp post was metal, not suitable for nails, but packing tape worked great and cleaned up quickly.
With Backer Board, you'll need hammer & nail.
Without a Backer Board you can use a staple gun.
Two points from this image:
1) Backer board is not necessary, just nice.
2) Clean up your signs after the event. (the brown lump below this example is a sign for a sale from an earlier weekend).
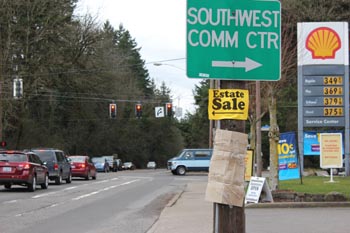
Remember to put a date on your sign in small (12-14 point) type. List the date and hours of the sale. This way a good citizen can pull down your sign if you flake-out and fail to clean up after yourself, as I did with the brown sign above on Sunday.
Since you can read the gasoline prices, I'll mention that the date was Feb 18-20, 2011.
|
Remember: You Have Competition:
There are a lot of garage / garden / moving / yard / neighborhood & estate sales
competing with you for those weekend dollars. So:
- Make your signs distinctive.
- Put them everywhere.
- If there's a long stretch of street or road, place more signs to encourage people to "keep going this-a-way"
How do you pull the most buyers?
- Help your buyers find you.
Put up lots and lots of signs.
- Brand your event
Use easy to read and easy to remember signs. You already know that most sales do not, so you're already ahead of the competition.
Set your sale apart from the rest with distinct and easy-to-follow signs.
A buyer following YOUR unique signs, will go all the way to your location, even if they happen to stop at others along the way.
- Put signs all over the area.
A sign at every corner along the way is not overkill.
- Place more signs
if there's a long stretch or several blocks from the last turn, to encourage people to "keep going this-a-way"
- Commercial signs are good.
Dollar-Tree type stores have them sometimes, otherwise expect to pay $3-5 each.
- Craigslist is your friend.
Free advertising is good. Advertise on Craigslist, they'll really appreciate it.
Below are some DIY ideas.
You can make a LOT of signs for less than $20.
At left, are pix of signs from a very successful sale. These signs and a free Craigslist ad were the only promotion.
At right are the graphic files that created these signs. There are also files for the other types of sales people often have. These images are in .GIF format (just print 'em) and .PSD (You can edit 'em in Photoshop).
Plan where you'll post your signs.
Map your neighborood with Google Maps and plan where signs will go.
Have a solid idea of how many signs with arrows pointing left, right and forward you'll need.
You'll probably want 20% to 40% more signs than you think you'll need, because opportunity always pops up as you're out hanging your signs in the neighborhood.
Once you've built your map, drive your neighborhood, looking for extra places to hang the signs. Watch for corners that need more than one sign.
Make notes on your maps.
Materials and Printing
These were printed on 11"x17" neon-colored "Cardstock" paper, and stuck onto foam-core board.
If you don't have a neon colored paper, any color is ok. Even white is OK. Do try to make all signs the same color and typeface.
If you can't find colored foam-core backing boards, white is OK.
If you don't have a 11x17" printer, Kinko's, Office Depot, Staples and Office Max all do.
They generally have colored paper in stock as well.
You can print a lot of signs on colored paper for $5-$20 at the copy store.
If you're not going to use a backer board, printing on "cardstock" has big advantages in the field.
A 11" x 17" sign stuck on half of a foam-core backer board is easy to see from a distance at 40 mph.
8.5" x 11" paper works too, it just isn't visible from as far away.
At Dollar-Tree or similar stores, you can get:
- Glue sticks.
- Clear tape.
- Magic Markers.
- Price Stickers for sale items.
- 20" x 30" Foam-core board
- You can cut these in half to make 2 signs. That's just $0.50 / sign.
Most hardware, variety and craft stores will have foam-core boards but it will cost more than $1. Think: Ace Hardware, Kroger, WalMart, Joanne Fabrics, Michaels and Home Depot.
Dark/colored foam core is good, but white is OK, especially if you use a colored paper for the sign body.
Printer supply stores are also good sources.
Assembly
Stick the paper/cardstock sign to the foam core backer board with glue sticks or tape.
We stretched a single long run of clear packing tape, all the way across the top and bottom of the sign. If you have a better idea, use it.
If it might rain protect your signs with food wrap or tape.
In the pix at left we show using both 12" food-wrap and 18" food-wrap.
We also show repeating 2" strips of tape along the 11" width. One 50' roll of packing tape from Dollar-Tree can protect 4 signs - that's just $0.25 each.
Use your creativity to make your signs stand out from the crowd.
As you can see, Neon Paper is used here.
However, if all you can find / afford is white paper on white foam core, consider some brightly colored spray paint from a rattle-can to highlight the edges or the words.
Other things you can do to brand your event include pasting on some stars or stripes, tie on a balloon, "put a bird on it" or ... or just have fun using your imagination!
Before The Event
Consider a "Dress Rehearsal" for hanging signs.
Time your crew (or just yourself) getting out of the car and hanging a sign at home. Next drive your sign map, coming to a full stop at each sign spot. Plan to post signs closest to the event first, then push out as far as your plan indicates.
Note your start and finish time.
Multiply your 'exiting the car and hanging a sign,' times the number of signs.
Add the two numbers, then add 25% to 50% to that total.
Day of The Event
Have someone "watch the store" while someone else goes out to hang the signs. If you have four people, split into two teams.
At the end of the last day, reverse this. Have someone "Watch the Store" while someone else goes out to fetch the signs. Start furthest out, and work inward.
If you flake and fail to clean up your signs when you have decided to close on the last day, expect people to knock on your door late into the evening and sometimes even the next day.
A Closed sign is a good idea for end of day and end of sale.
What If It Rains II?
Some kind readers gave me this delightful image with a neat hack for wet days:
They printed their notices in components on common 8.5" x 11" plastic sheets sold for overhead-projector transparencies. (It's old school and it rocks!)
Everything including direction arrows were printed and cut as needed.
Then using standard and cheap 2" packing tape, they attached the pieces to brightly colored 11" x 17" slabs of foamcore.
(Dollar-Tree Foamcore with colored stock works too)
The foamcore was nailed to cheap garden stakes, which they bought at Home Depot.
Verdella said that ink-jet printing didn't dry very fast and ran when wet, but laser-printer toner was dry right away and didn't run.
Brilliant! Well done Deb and Verdella!
What If It Rains III?
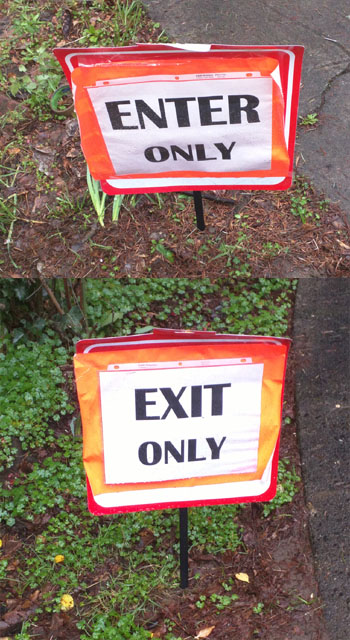
Deb and Verdella later gave me one more hack worth sharing. You will of course want signs inside and outside of your sale.
If it's raining, that too can be a problem you solve with creativity.
They put 8.5" x 11" DIY signs inside of those plastic sheets one uses for business presentations, and taped it to a generic lawn sign.
O.C.D. Options
Put the address of the sale on the signs in at least 72 point (1 inch) letters. You can do this three ways
- Edit the sign file
- Run the paper through the printer twice
- Print an "add on" and tape it to the sign or the backer board.
Put the date and hours of the event on the sign - smallish print is fine. This way if you fail to pull down your own signs, someone else can do it for you, to reduce competition and clutter, when they go out to post their own signs.
|
Download a large version of the signs below in printable GIF format.
The Adobe .PSD format file can also be edited with the right software.
To have them printed at Kinkos / Staples / Office-Depot-Max: burn the files to a CDR or copy to thumb drive.
This universal direction design prints "Portrait" alignment. You can point it left, right or forward.
GIF .PSD
GIF .PSD
GIF .PSD
GIF .PSD
GIF .PSD
GIF .PSD
GIF .PSD

GIF .PSD
GIF .PSD

GIF .PSD

GIF .PSD

GIF .PSD

GIF .PSD
GIF .PSD
GIF .PSD
GIF .PSD

GIF .PSD
These were built in Photoshop 7, using the "Cooper" font.
Of course you can make your own signs, using your own choice of font. To make your sign in Word or a similar prgram, know that you won't be able to get the tight line spacing shown here unless you put each line inside a text box.
|